Thanks to the gracious Taylor and Red for having my husband Darren and me as overnight guests. Here are a few images I shot while there.... nary a white-covered mountain or ski bunny in sight....
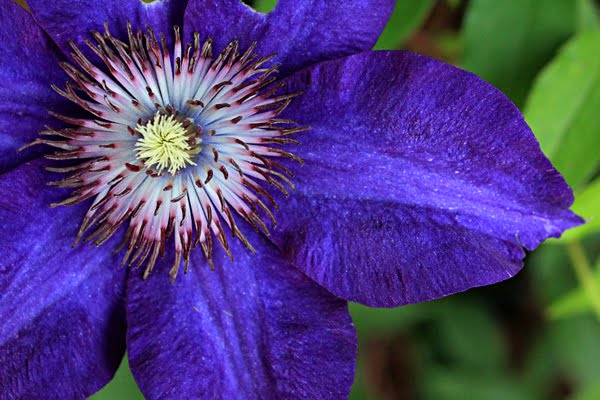
Can't resist shooting flowers:
Fresh fruit with breakfast:
Detail of post-n-beam construction:
The mud made for a fascinating monochromatic image:
Inside of large metal bowl looked like an abstract painting:
This little guy was checking out the grape leaves, too:
And finally, the uncooked rice that may have saved my telephoto lens from certain doom after it fell into the frog pond:
Outside Kittery Trading Post, Kittery, ME, one of the few stores where you'll hear over the store intercom: "Shooting Sports Department Associate, Dial 911." (A bit of hyperbole: the extension was actually "511".)
Yes, flowers again. I am still enamoured with Prescott Park (Portsmouth, NH), even though I had absolutely zero motivation to shoot today. Here are a few of my favorite shots:
This past year, I participated as an artist volunteer in “the Art of Recovery,” a collaboration between the NH Art Association and the Seacoast Mental Health Center (Portsmouth, NH.) Over several months, I met with “K” and shared our love for photography… and life.
Check out my blog archives (see right) for other entries about the project.
What I didn’t tell anyone at the time was that only a few weeks after I agreed to participate in the program, I had just been diagnosed with DCIS, an early form of breast cancer. So while it may have looked on the outside as if I was somehow “helping” K heal and providing her hope for persevering over her medical condition, she was unknowingly doing the same for me.
Few of us take the time to appreciate fully the synergy between art, healing, and hope. Doctors generally understand the connection: that’s why they practice “Medical Arts.” Others of us feel that some magical potion is simmering below the surface, although we may not how to put into words. For example, we often make ourselves feel better by immersing ourselves in the arts. We enjoy works of art that others have made: we watch a movie, read poetry, listen to music, or visit a museum. Or we do something creative ourselves: whether it’s planting a tree, cooking, or woodworking. We may not always be in awe of the communicative and healing powers of artistic expression, but we sense that it somehow “makes us feel better” and helps us put one foot in front of another for even just one more day. Oftentimes, that is enough.
A month or so, I attended a fundraising event for the Art of Recovery, where the patient participants auctioned off some of the masterpieces they created during their collaborations with Art Association members. K, accompanied by her mother and sister, beamed with pride as attendees complimented her on her work. She deserved it: she's a natural talent. She may not have fully conquered her condition yet. But that night, I had the honor of watching her spirit soar to the evening sky and waltz with the stars. Moreover, the voodoo spell that DCIS cast on my own life was temporarily broken, too.
The following is a collage I made last weekend at a retreat for cancer survivors (both patients and their loved ones/caregivers):
Each time I look at it, I'm hypnotized by its ugliness: it makes me feel like I'm staring down "the C beast" and refusing to give in to fear. Physician, heal thyself.....
...during this impromptu photo shoot in Vermont yesterday afternoon. Snapping away merrily in sandals near a pond SEEMED like a good idea at the time. However, I made a speedy retreat after he spotted a mid-afternoon snack at the bottom of my legs:
This next photo is my favorite: it looks like he's saluting the flag!
I don't usually create artwork to fit a specific frame, but today, I made an exception. (I repurposed two of my favorite 2011 images into a new composition to fit an ornate silver frame I found yesterday at Home Goods.)
This:
plus this:
and some rudimentary Photoshopping results in
I consider this photo-based artwork to be almost the antithesis of contemplative photography because I was simply Photoshopping existing images as a stress reliever, not shooting or editing as a meditative practice. Also, because I had a certain upcoming show in mind, my focus was on creating an image which would pass the jurying process and showcase a unique artistic vision. In other words, I actively worked to ***emphasize*** the difference between artist and viewer and create something that previously existed only in my mind. (Rather than achieving direct perception of an already existing object and erasing the artist/viewer duality.)
My so-called "artistic vision" was hardly high-brow: I've been humming the Rolling Stones' "She's a Rainbow" all week long after watching Mick Jagger on SNL last weekend and wanted to create a ***subdued*** "rainbow" face. (Rather than a technicolor rainbow that looks like it should have a leprechaun or unicorn next to it.) While I'm happy overall with the quality of the finished piece, I just realized that, more than anything else, it looks like one of my "Borg" migraines!
Hopefully, someone who doesn't get headaches will like it. Otherwise, I may be the first photographer I know to offer "Free bottle of Excedrin Migraine tablets with purchase." (And yes, I know that technically, migraines and headaches are two separate ailments.)
The concept of "fine art photography" isn't as terribly radical a notion as it once might have been. Most art associations -- including the New Hampshire art Association -- accept photographers as juried members. Also, it's becoming less and less common for show organizers to state "absolutely no photography will be considered" on show prospectuses. Furthermore, buyers are finding that it can be affordable to purchase photography. (This "low cost of entry" also allows them to "test the waters" before deciding to become a serious collector of fine art photographic images.)
The "Articles" section of my web site contains numerous articles on fine art photography and becoming a fine art photographer. However, this is the first essay I've written which attempts to address "contemplative photography." While there is some degree of overlap between the two practices, not all fine art photographers practice contemplative photography. Similarly, not all practitioners of contemplative photography (or miksang, for that matter) are fine artists.
This image appears within the "Color" user gallery at seeingfresh.com
Contemplative photography is not measured by the standard criteria of what constitutes "fine art" (such as maturity of vision, color, composition, execution, consistency of work.) Rather, contemplative is distinguished by the intent of the photographer at blurring the dualities between photographer and subject, and between image and viewer. Most of the literature out there on contemplative photography focuses its attention on what the artist brings to the process of making the images. (I recoil at using the term "most of the literature out there." because up until a few years ago, it was difficult to find anything on the subject.) However, I break from the pack by believing the principles of contemplative photography don't end once the exposure is made: instead, I think that they apply equally to the acts of editing and curating images, as well as making later derivative works from the original shots.
Through traditional art, artists use various media to communicate their vision and response to the world around them. The artist's personal vision can range from outrage and advocacy through peace and serenity. However, there's always a "me" or "I' or "my" in the equation. Moreover, the viewer observes the artwork through the artist's eyes (even though certainly we all bring our own background and experiences to the action of perceiving.) Contemplative photography, on the other hand, is primarily a meditative practice, rather than an expression of self/ego.
In contemplative photography, the photographer works at directly experiencing reality without the "self" filter complicating matters. The resultant photo just happens to be an artifact of those efforts. (If the photo happens to help the viewer achieve a similar state, then so mach the better.) For this reason, comtemplative photographs are often distinguishable by their directness and immediacy.
So what happens when a fine arts photographer takes up the practice of contemplative photography? That differs for each person, but my experience has been that being an artist influences my subject choice and the way I compose pictures. But my meditative practice, once a potential subject has been identified and framed, is no different than that of a non-artist. I do think that I'm tougher on myself than are non-artist practitioners. I look at the resultant photos with an overly-critical eye and discard "successful" contemplative images simply because they don't meet the traditional standards of "art." While I try to convince myself that some of the most successful feng shui'ed rooms are pretty ugly, I still keep hitting the "delete" key.
Tricycle Magazine recently published a noteworthy article on why the relationship between Zen and art is neither as simple nor as obvious as the cliche of "Zen and the Art of [insert any topic]" implies.
"We know, equally, that Leonardo da Vinci was operating within a Christian context, but the fact that he painted The Last Supper doesn’t inspire us to value his art primarily for some abstracted notion of Christianity."
Created as 6x4" image from a single digital photograph for easy printing at any photo lab. The intent is to place the print in a folded #10 envelope and insert into the stereoscope's card carrier. (Vintage stereoscope cards measure about 7 x 3.5".)
While shooting in the woods behind my apartment today, I came across an abandoned antique car:
Following are some rough edits of pix I shot. Note that they are heavily influenced by the work I've been doing with "K" recently. (See previous post.) While I loved the rust color on the original color photos, I found these worked better as black-and-white images:
[Note that when I said I was "shooting" behind my apartment, I meant ***with my camera***. I am not responsible for any of the bullet holes in the car.]